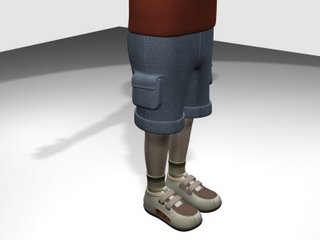
3D character : Update 5 (clothes and shoes textured)
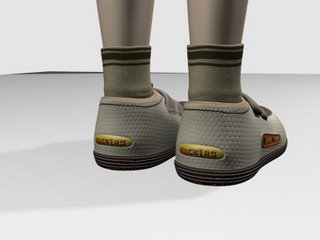
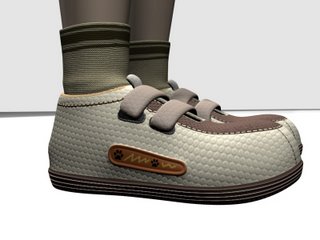
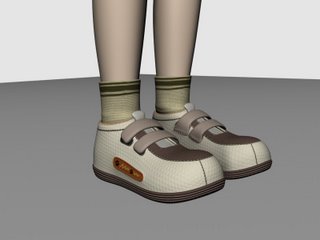
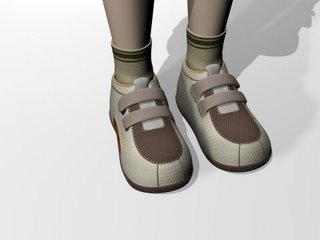
I have finally done texturing to clothes and shoes of my 3d character. Here are few updates on that. Shoe was the most difficult and time consuming. Rearranging uv coordinates took almost a day! It was really difficult to find or put suitable shoe material. Besides color choice was not easy either, I had a lot of combos but finally I settled down with chocolate color theme, I used very mild light shade of chocolate color for body.
Cargo pant was not that difficult in terms of texture material. Though I had to play around a lot to find good texture and resize/tile to get the best out of sample cloth material. But jeans material are not difficult to find. But just the jeans material was too plain, so I thought of creating stitches. And initially I was reluctant because I thought it would take a real long time for me to figure out how to make stitches. I played a lot with photoshop brushes but I was not getting the realistic effect. Because there are 2 layers for stitches, 1 consists of actual thread line and second for the holes in the cloth (darker tone). And I needed 2 separate color shades for both the layers, thus a need for 2 separate brushes to make threads. I will write a tutorial on this some day. But this technique was really helpful further to create stitches.
For shoe I had a real tough time selecting materials and texture patterns. I had to tweak different patterns a great deal to achieve some good looking effect. Some patterns were multipurpose. If you change the size or orientation or contrast of pattern, it will look different and can be used for different purposes.


8 comments:
Hey dude! Cheers from Brazil!
Good work, I allways wanted to learn 3d but still very hard to me. Keep going!
Thanks pedro! May be I can help you from what i know.
absolutely fantastic shoes!! :)
great job! keep it up
Thanks guys :)
great work...!!!I'm tryin my hands on 3d....still crawling....wud u plz help me??
u used sub-division modellin or nurbs 4 it?? wat's better n easy?
I used poly modelling and subd. Subd is more versatile and now a days widely used. I would recommend poly modelling over nurbs. You will need to learn some modelling basics first like how to sculpt in poly modelling and how to keep mesh clean to get smooth surface after subd. hope this helps. Thanks for commenting.
nice post!!!!things in that blog are good...once upon a time when i went to excursion ....there was a big summer....Timberland shoes are only thing i believed on that condition.....
Post a Comment